My Christmas present this year was a model kit. Similar to an airfix kit, but this is made of wood.
 Inside the box was 8 sheets of plywood, lovely smell. Plus a pack of toothpicks and rubber bands. First impression was of high quality. Even the box looked good.
It was impressive how they managed to squeeze all the components on the boards. You could see how some shapes were offset in order to squeeze in between some curves. If a section had a large cutout, like a window, some smaller shapes were squeezed into that.Holding the boards up to the light, you could see the cuts. The entire shape, including intricate little wiggles, were cut by a laser, leaving the tiniest fraction of wood holding the shape in place. I noticed not a single piece was hanging loose. An airfix model always had an odd piece that had become detached.
The build
My plan is to spread the build over the next few weekends. Tempting as it is to finish in one sitting, I am going to do a page from the instruction manual then stop.
The instruction booklet is quite clear. The diagram shows which parts to retrieve from which board. Took me a while to realise that the boards were numbered! There are numbers printed on the board, but not immediately apparent which one is the board number.
The next step is the tricky bit, pushing out the component from the board. You have to be careful, enough force to break the final slithers of connecting wood but you also do not want to lose control and snap off some of the tiny protrusions.
My very first piece was a cog wheel and I lost a small bit of the top layer of ply from one of the cogs. This was a general problem throughout, the connecting piece of wood (we are talking 0.01mm) tended to peel into the top layer of ply. Later on I started to make a nick in the connected wood with a Stanley knife blade which largely prevented the peeling.
Next step is the assembly. The picture instructions are clear but you have to be careful. It is easy to end up with two left sides if you had not realised the pieces needed to be mirrored.
The other problem I encountered was that it seemed to take excessive force to join the pieces together. I was having to push a tiny piece into a predrilled hole, and it wouldn’t budge. I was scared to push too hard in case it broke. The instructions do include the use of a candle to lubricate the joints. Although this actually referred to the moving parts, I found that waxing up the tenon made it much easier to assemble. I still have to discover if waxed joints are good or bad in the long run.
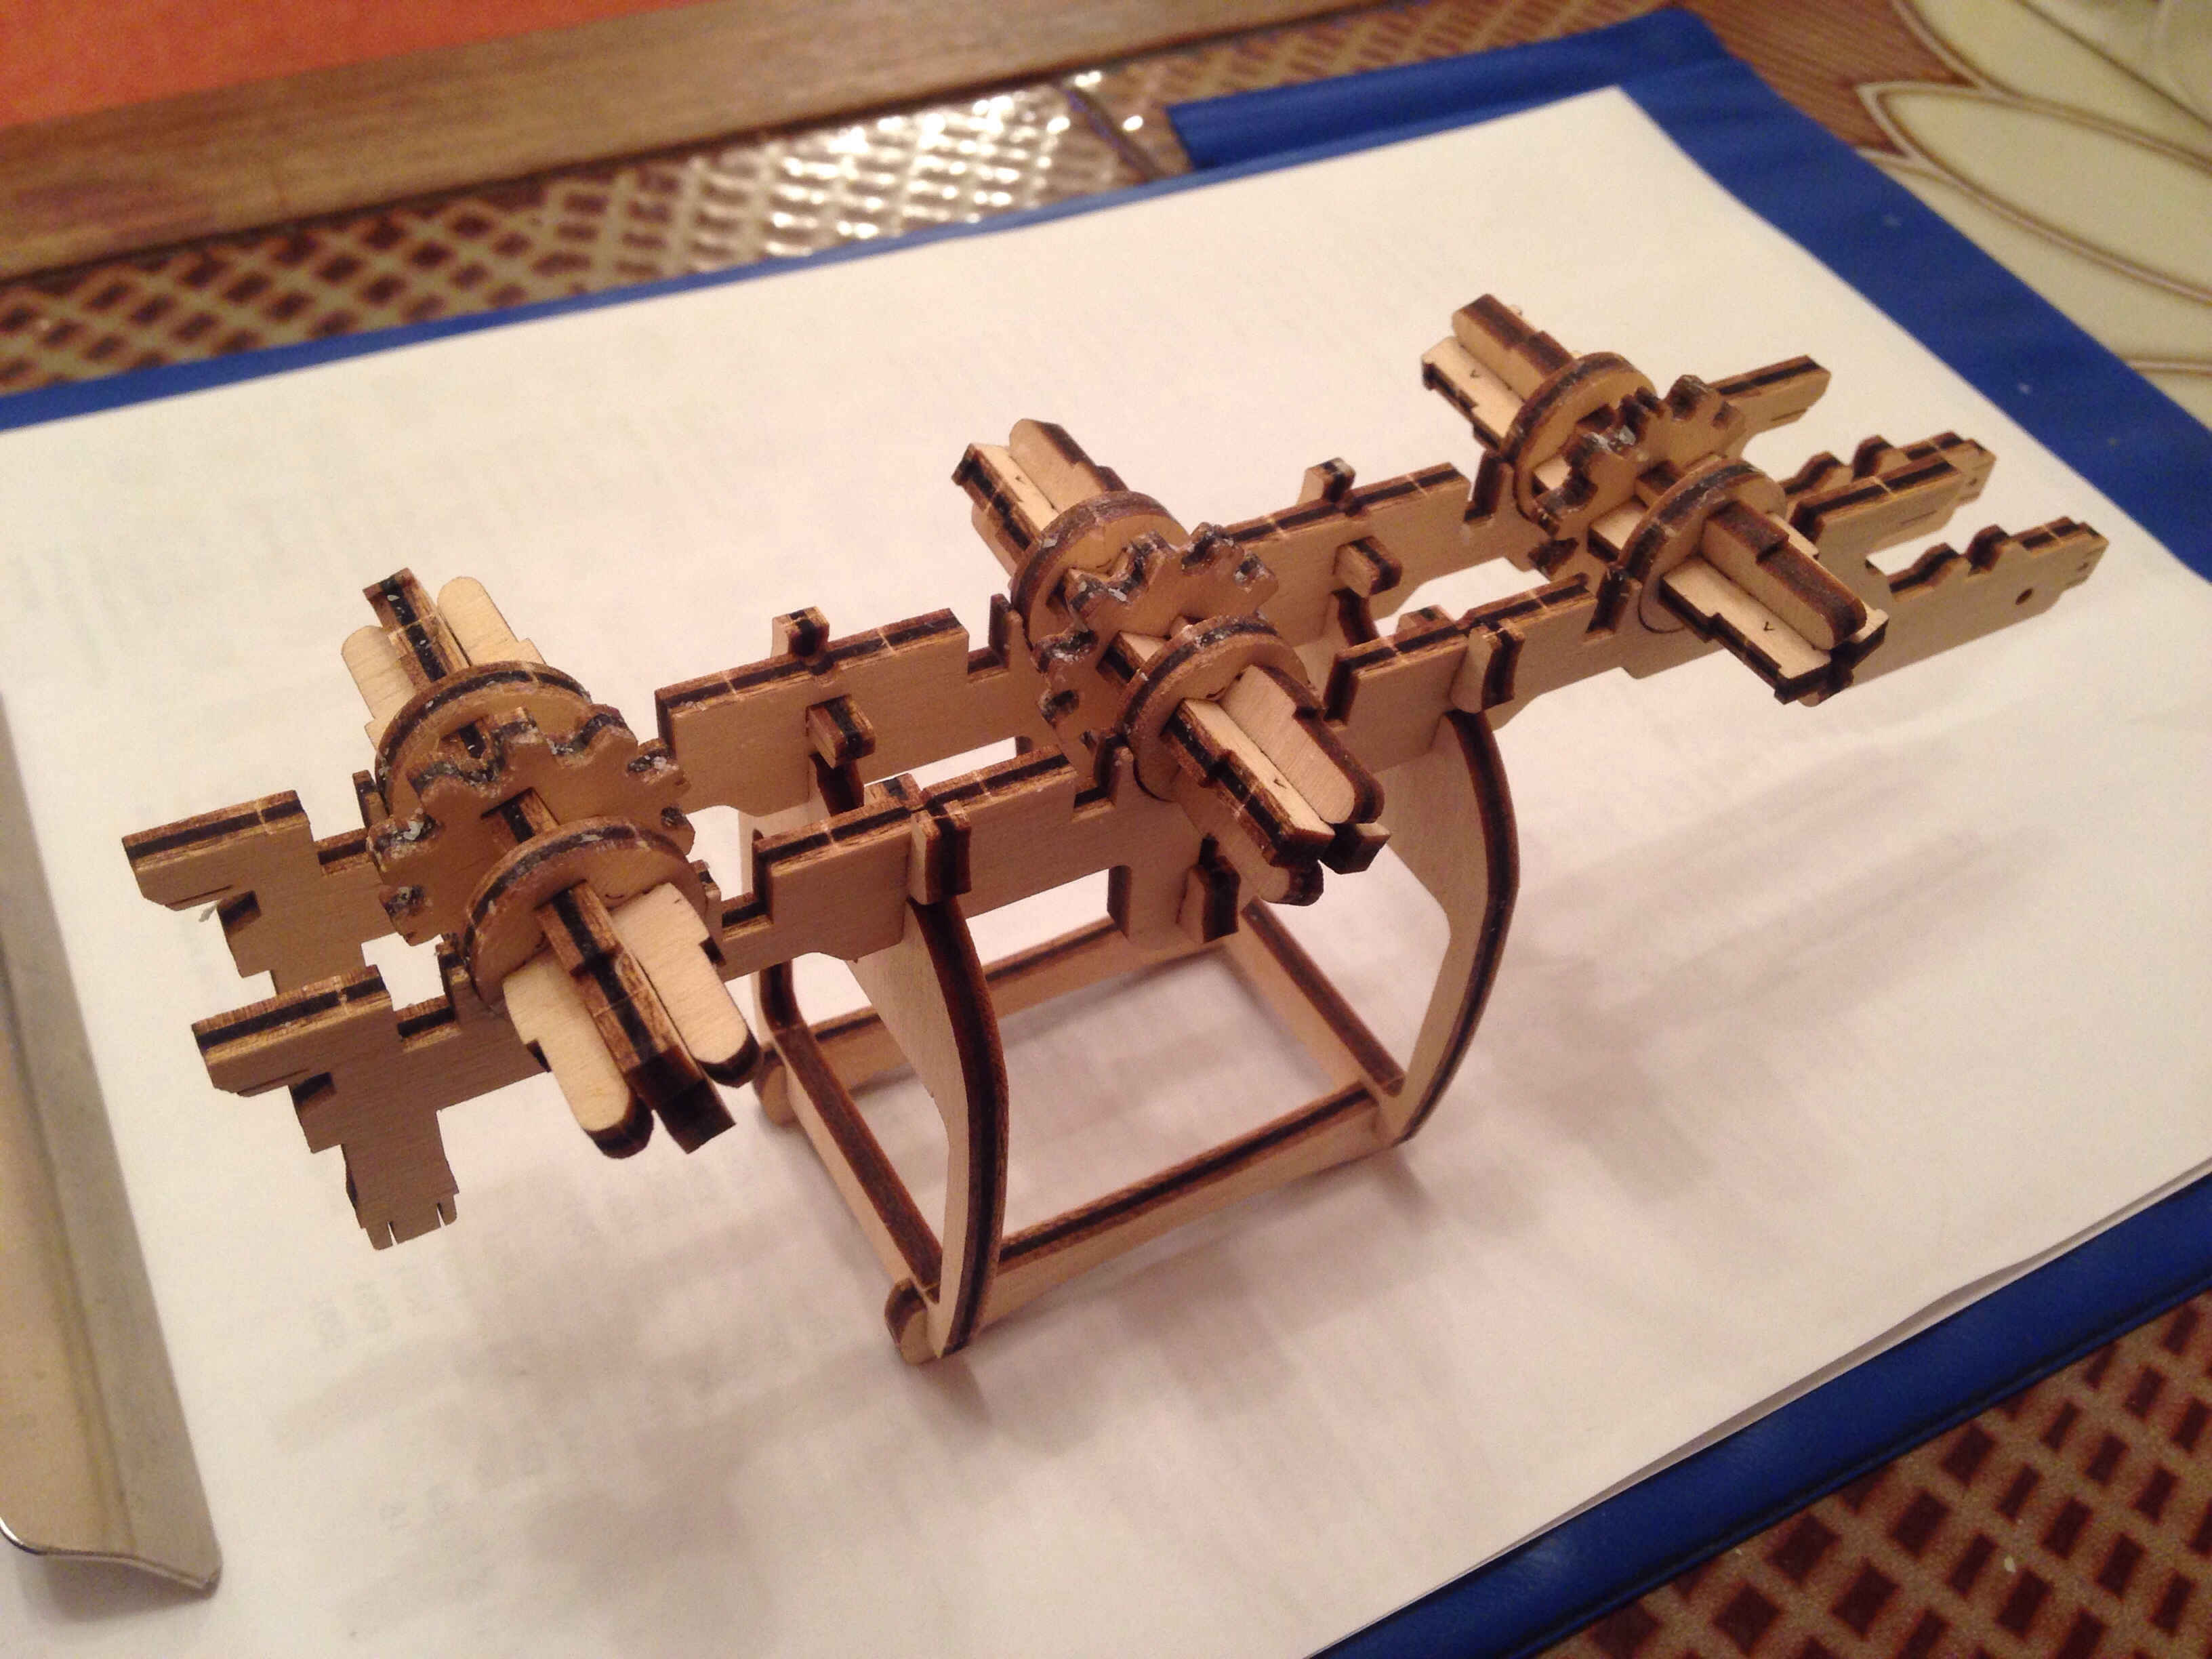
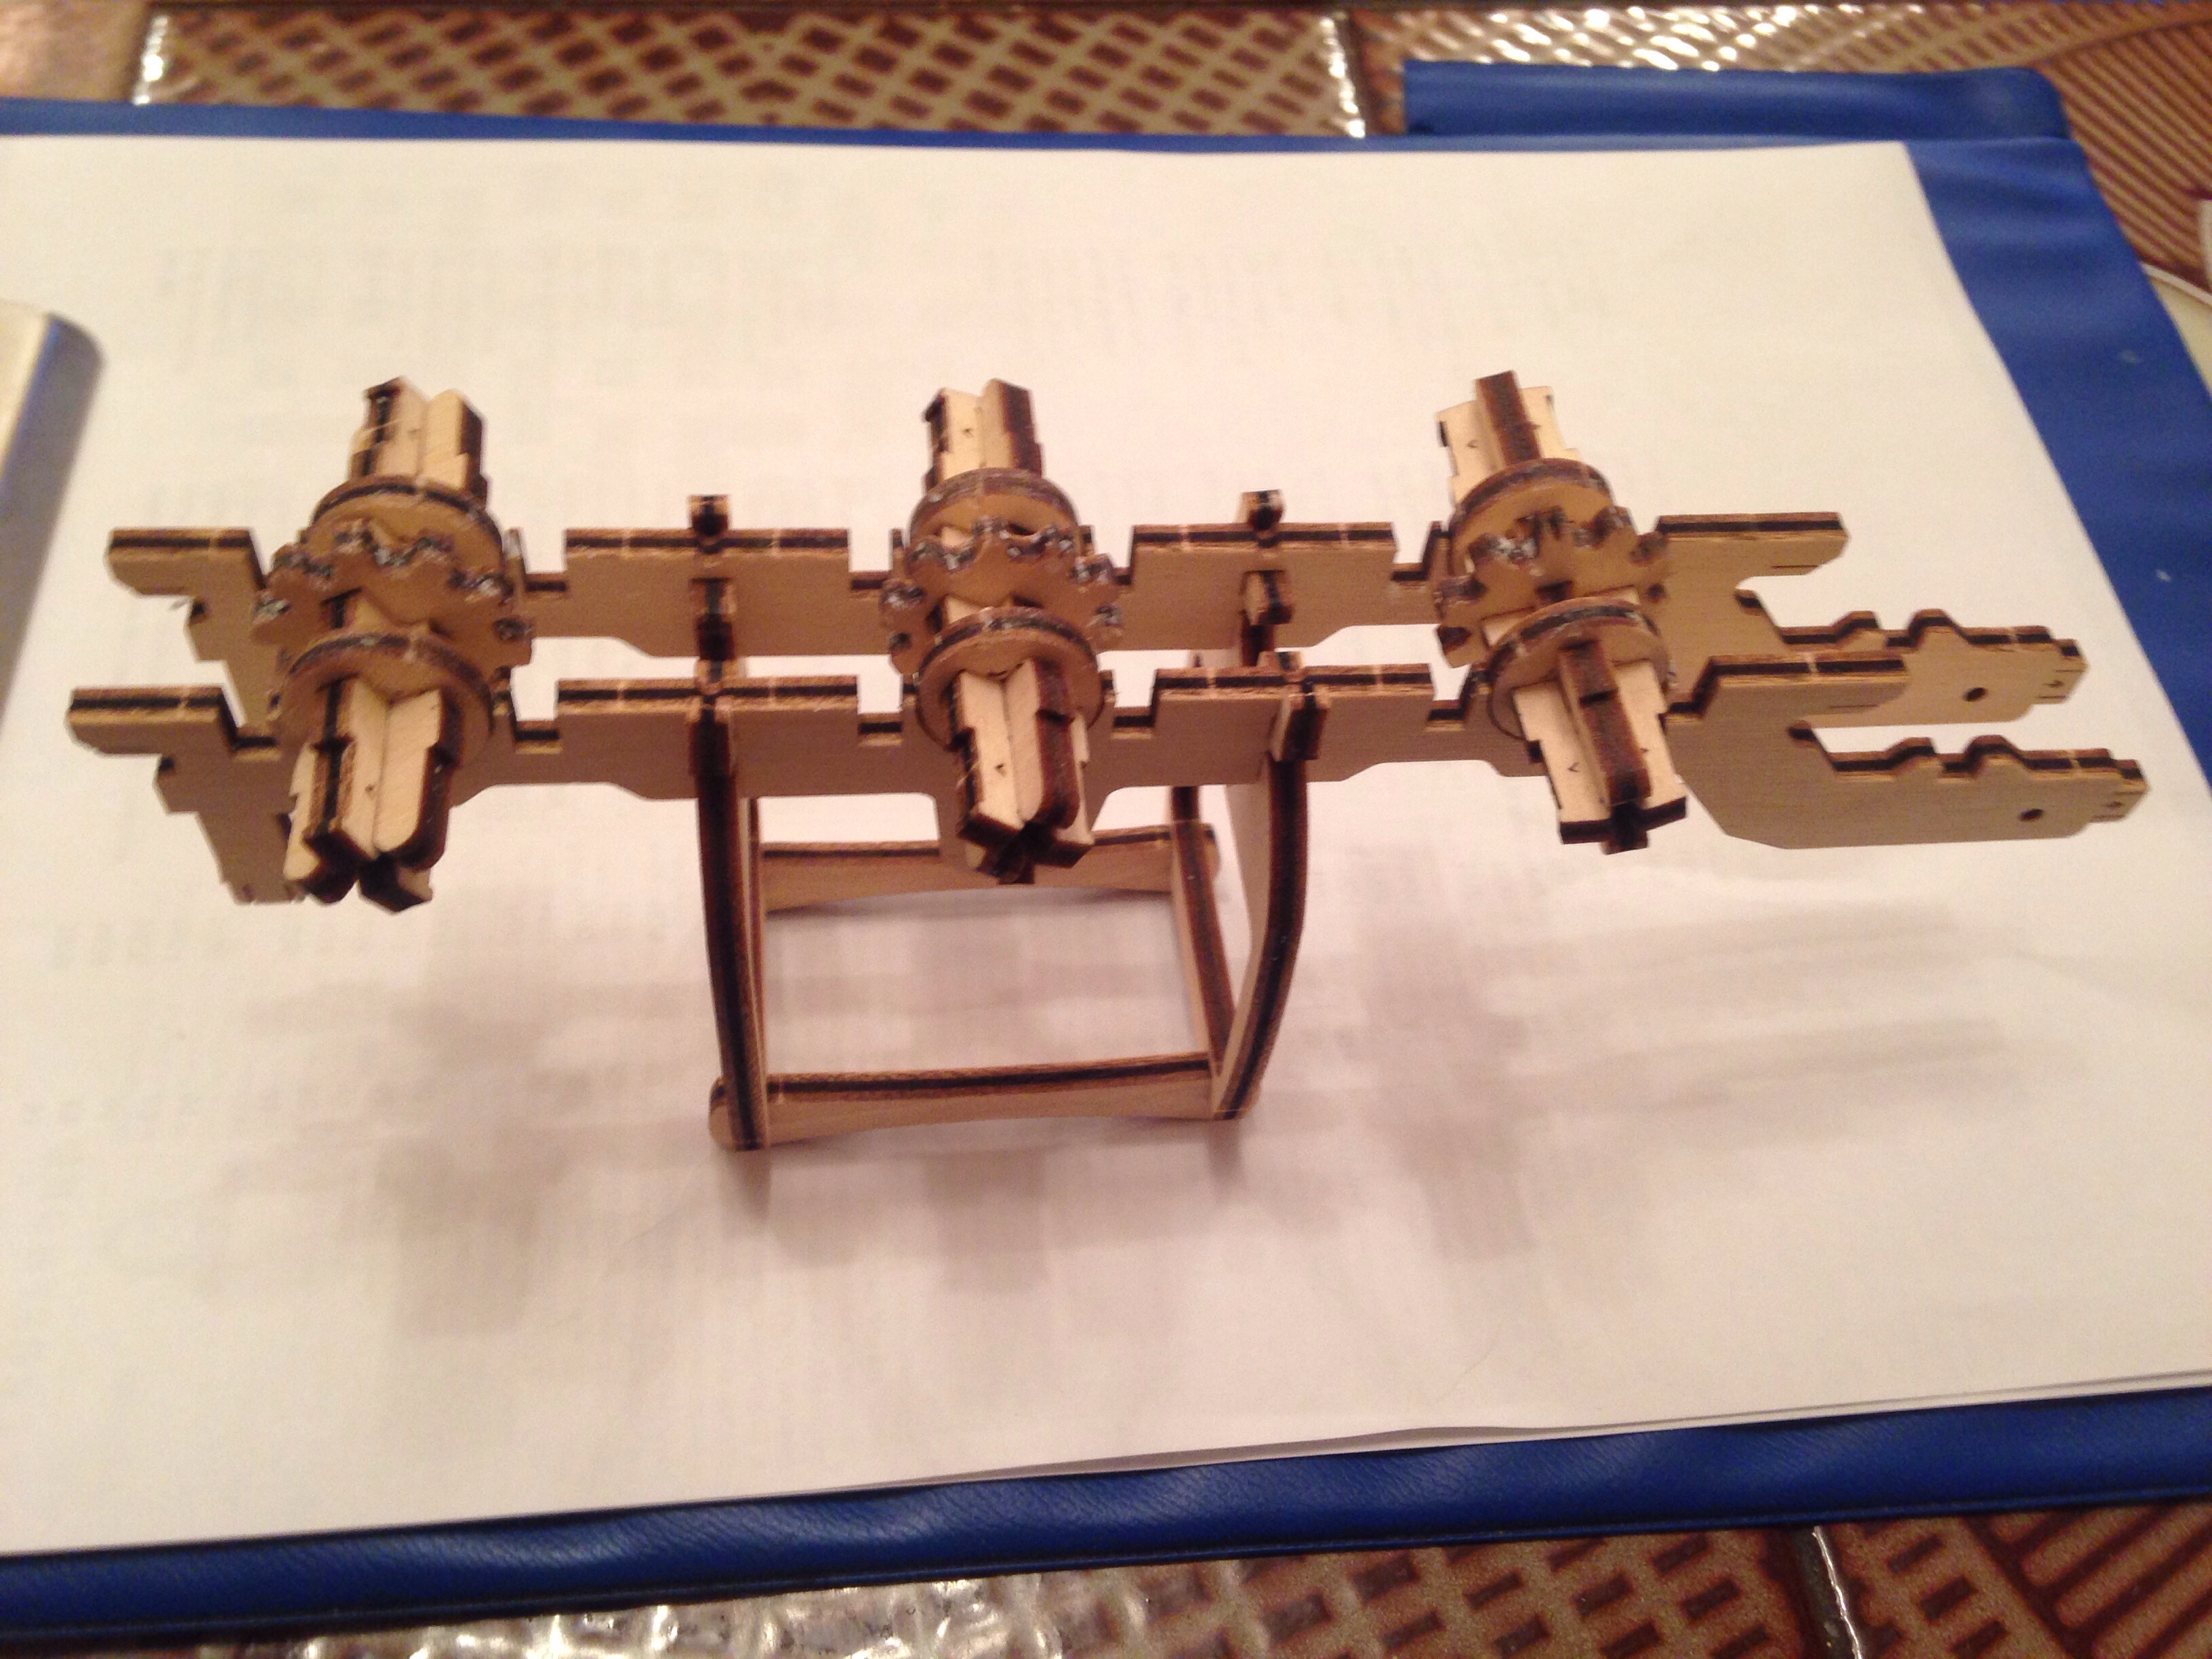
At the end of day one, I had assembled 3 wheel axles and the base of the chassis. Note, the train is upside down in the pictures.