I have been running a fairly busy site on a hosted package which included a Cloudflare subscription. I moved the site to my Ubuntu server which had fail2ban running.
All seemed to be working. People were being blocked and a few were ending up in recidive. But when I started getting Emails from Cloudflare saying they could not contact my site, I looked a bit deeper.
It dawned on me that the IPs being blocked belonged to Cloudflare. All my traffic was now being routed via Cloudflare’s relatively small range of addresses. Each individual IP would in reality be handling numerous visitors. Blocking one would be blocking many visitors, not just my “hacker”.
My first attempt at a solution was to whitelist Cloudflare from my recidive jail. My thinking was that a 10 minute block on a IP would stop the hacker, and I would avoid doing a longer recidive ban that would interfere with my normal traffic. Upon testing I discovered that Cloudflare varies the IP address on each call to my site.
The result is that fail2ban may block an IP, but the hacker carries on unhindered on another IP, leaving a trail of blocked IPs in his wake.
The solution is to block the unwanted visitor by adding his actual IP to the Cloudflare firewall. I found out too late that there is already a cloudflare action included within fail2ban. My searches also indicated that Cloudflare had updated their API beyond the fail2ban So I do not know if using the vanilla version would have helped.
I am now running with fail2ban blocking the correct IPs at cloudflare, as well as blocking the correct IP locally on behalf of my other sites.
Instructions
The first step is to get the visitors original IP address passed through to your site. The option I chose was to enable the remoteip mod included within the latest Apache package. This supersedes the mod_cloudflare mod which is no longer supported.
Restoring original visitor IPs – Option 2: Installing mod_remoteip with Apache
The installation is a simple enable mod.
sudo a2enmod remoteipThey suggest updating the logformat within the general apache.conf but this assumes all your sites are on Cloudflare. I went for the updated on an individual basis adding the logformat to my virtual host files.
<VirtualHost *:443>

 RemoteIPHeader CF-Connecting-IP

LogFormat "%a %l %u %t \"%r\" %>s %O \"%{Referer}i\" \"%{User-Agent}i\"" combined
ErrorLog ${APACHE_LOG_DIR}/mywebsite.error.log
CustomLog ${APACHE_LOG_DIR}/mywebsite.access.log combined

# GET LATEST LIST FROM CLOUDFLARE
# https://www.cloudflare.com/ips/
RemoteIPTrustedProxy 173.245.48.0/20
RemoteIPTrustedProxy 103.21.244.0/22
RemoteIPTrustedProxy 103.22.200.0/22
RemoteIPTrustedProxy 103.31.4.0/22
RemoteIPTrustedProxy 141.101.64.0/18
RemoteIPTrustedProxy 108.162.192.0/18
RemoteIPTrustedProxy 190.93.240.0/20
RemoteIPTrustedProxy 188.114.96.0/20
RemoteIPTrustedProxy 197.234.240.0/22
RemoteIPTrustedProxy 198.41.128.0/17
RemoteIPTrustedProxy 162.158.0.0/15
RemoteIPTrustedProxy 104.16.0.0/12
RemoteIPTrustedProxy 172.64.0.0/13
RemoteIPTrustedProxy 131.0.72.0/22
RemoteIPTrustedProxy 2400:cb00::/32
RemoteIPTrustedProxy 2606:4700::/32
RemoteIPTrustedProxy 2803:f800::/32
RemoteIPTrustedProxy 2405:b500::/32
RemoteIPTrustedProxy 2405:8100::/32
RemoteIPTrustedProxy 2a06:98c0::/29
RemoteIPTrustedProxy 2c0f:f248::/32

</VirtualHost>
After restarting Apache, we now have the users original IP appearing in the logs. We are now able to add the cloudflare actions to fail2ban. The following guide was my inspiration. I found I had to make a tweak to the curl call (see the comments about tr -d ‘ ‘) but it pretty much worked out of the box.
How to Integrate fail2ban with CloudFlare API v4 Guide
About letting it run, I decided I wanted a bit more information in the Cloudflare block so I added the time and jail name.
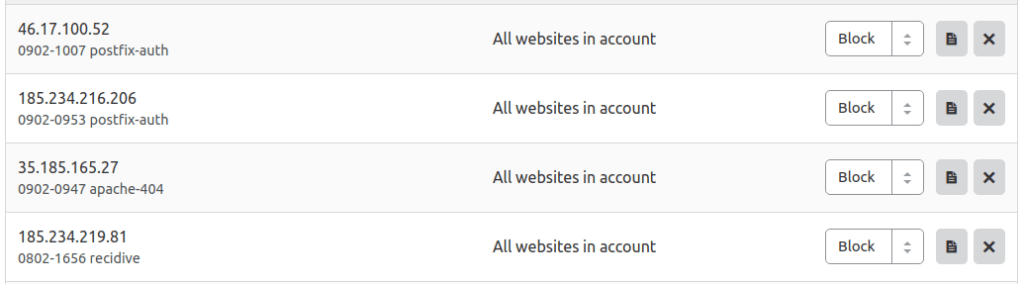
The display limits the number of characters, so the date-time is in a strange format to save room.
My version of the actionban is reproduced below. <time> is a parameter that is available to the action scripts and is the time the ban was created. <name> is a parameter passed to the action and is configured elsewhere.
actionban = TIMESTAMP=`date --date=@<time> +%%d%%m-%%H%%M`
curl -s -X POST "https://api.cloudflare.com/client/v4/user/firewall/access_rules/rules" \
            -H "X-Auth-Email: <cfuser>" \
            -H "X-Auth-Key: <cftoken>" \
            -H "Content-Type: application/json" \
            --data '{"mode":"block","configuration":{"target":"ip","value":"<ip>"},"notes":"'$TIMESTAMP' <name>"}'
Surprisingly, the jail name is not available by default in the action script. It has to be passed in. This is configured in your jail.local
action_yeogle = 	cloudflare[name=%(__name__)s]
		%(banaction)s[name=%(__name__)s, bantime="%(bantime)s", port="%(port)s", protocol="%(protocol)s", chain="%(chain)s"]
             	%(mta)s-whois-lines[name=%(__name__)s, dest="%(destemail)s", logpath=%(logpath)s, chain="%(chain)s"]

action = %(action_yeogle)s
As you can see, I created my own action combo which includes cloudflare, an iptables ban and an Email notification.
One oddity – restarting fail2ban will remove all current bans before reinstating any that are still valid. This is a general feature meaning that any IPs manually unbanned will reappear. The implications for cloudflare is that the bans update to show the reload time and not the original ban time.
Thanks for posting this! It’s been a nightmare to figure it out on my own… but I eventually did it, too. Now I was searching for improvements and came across your post. I’m aware that it’s one year old, and, in the meantime, fail2ban has a new version which has improved the way it integrates with Cloudflare. It follows pretty much your concept; personally, I find it very important to use the timestamp as you do, to make sure that I can figure out when fail2ban blocked that particular IP on Cloudflare; I also keep logs from Cloudflare’s replies on a separate file (useful when debugging!).
Nice touch on the brand-new action combo! I saw that the default one, which lacks the jail
name, can easily be superseded onjail.localas well — that way, I can be sure that I haven’t forgotten anything on the configuration 🙂Oh wow, someone read my article 🙂 Glad to have helped. Its been months since I last checked my Cloudflare setup, I was glad to see it was still blocking people. Thanks for letting me know about the improved version, I will have to revisit my security.
there is a problem, that the ips transfered on cloudflare ban list may be there permanently, or not? and you dont want to permanently ban some ip
fail2ban, by default, only keeps a ban in place for an hour. When the hour expires, there is an unban script that runs. I haven’t mentioned it above, but it is described in the tutorial page I linked.
Isn’t a slash needed on that first actionban line?
actionban = TIMESTAMP=`date –date=@ +%%d%%m-%%H%%M`\
I suppose I could just use it the way you have it, but isn’t it wrong without it?
Never mind. It’s two separate commands. Sorry! You can delete my comment if you like.
Thanks for popping by and dropping a comment. WordPress messed around with the code formatting since I originally posted my article. I have tidied it a bit, but I think I must do it properly in the morning!
Well I just left you a glowing review along with some of the changes I made (spent about 10 minute writing the comment) and looks like wordpress dumped it down the memory hole! I made some minor changes and used more concise ban and unban lines that he mentioned, but didn’t explain well. They were better documented on the serverfault thread he linked. Your combo action variable idea was great and saved me a ton of editing. Well done!
Thank you again. It is nice to know someone has read my post and found it useful😁